今天的项目使用了一些旧谷仓板式木材,制作了一个简单且非常便宜的 感恩节中心装饰 我们的餐桌。
我和丈夫正在装修我们家的厨房和其他地方,因此我们有很多零碎的木头,这些木头就摆在那里等着我去处理。
对我来说,它们总有用武之地。 循环利用是我的中间名。 以旧换新是我们保护家庭环境的一小步。

感恩节餐桌布置通常会在餐桌中央摆放一个中心装饰品。 这个创意将成为任何节日餐桌的完美补充。
我们的桌子很长,是去年买的古董,作为送给自己的圣诞礼物。 感恩节中心装饰 还需要很长的时间才能看清它的正中间。
我还希望中心装饰可以互换,这样我也可以在圣诞节期间重新布置。
要想获得另一个漂亮的秋季中心装饰,可以看看这些 DIY 多肉南瓜花盆。 它们既容易制作,又美观大方。
请注意: 热胶枪和加热的胶水会燃烧。 使用热胶枪时请格外小心。 在开始任何项目之前,请学会正确使用工具。
是时候做一个简单的 感恩节中心装饰
我去了一趟当地的一元店,搜刮了一下我的手工艺用品,又在我家门前的松树旁快速扫了一圈,就找到了这个项目所需的一些用品。
我手头有很多以前做手工时用过的材料,最后都重复使用了,所以整个项目只花了我几块钱和一点时间!
See_also: 古法烤猪排 本帖包含联盟链接,为您提供手工体验。
要使 感恩节中心装饰 您将需要以下用品: 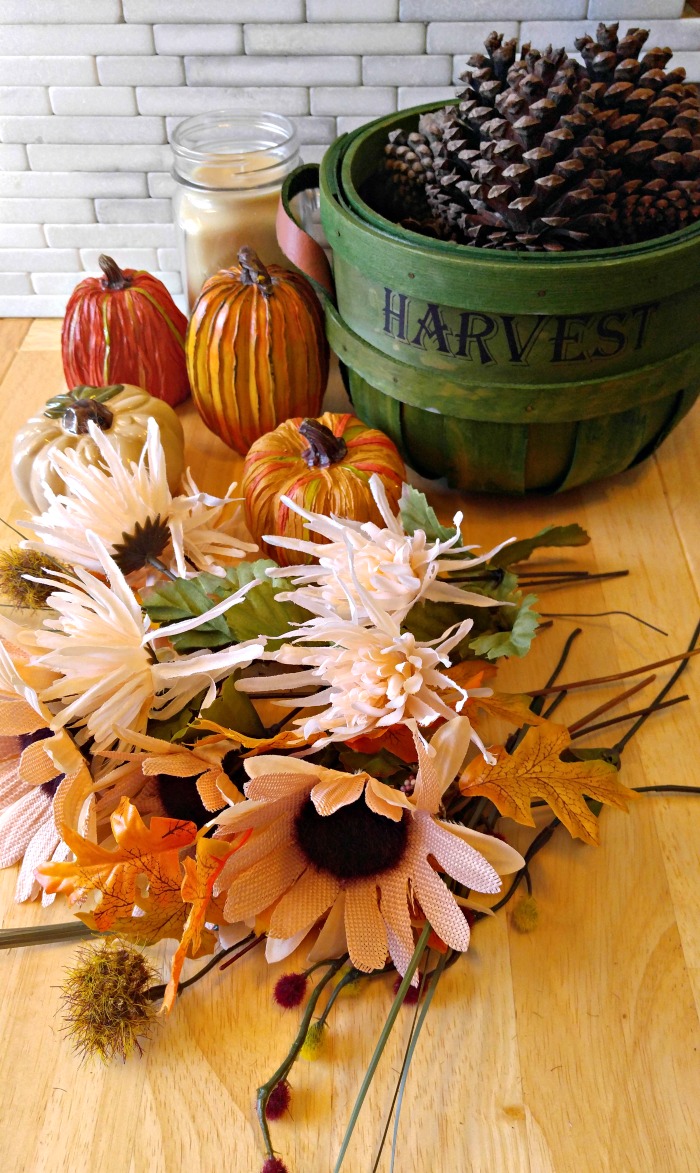
- 5 块再生木(2 块是 24 英寸 x 3 3/4英寸,2 块是 4 1/2 英寸 x 3 3/4英寸,1 块是 24 英寸 x 4 1/2 英寸
- 3 块花卉泡沫,按成品盒子的尺寸裁剪
- 指甲
- 深色胡桃木染色剂
- 前院的松果
- 4 个仿真小南瓜
- 1 支装在梅森瓶中的香味蜡烛(我用的是南瓜饼香料)。
- 秋季丝带
- 丝花和绿植(我用了向日葵、牡丹、垂柳和种子头)。
- 毛毡
- 毛毡垫
- 热胶枪和热胶棒
我首先测量了再生木材的尺寸,并将其切割成我需要的大小。 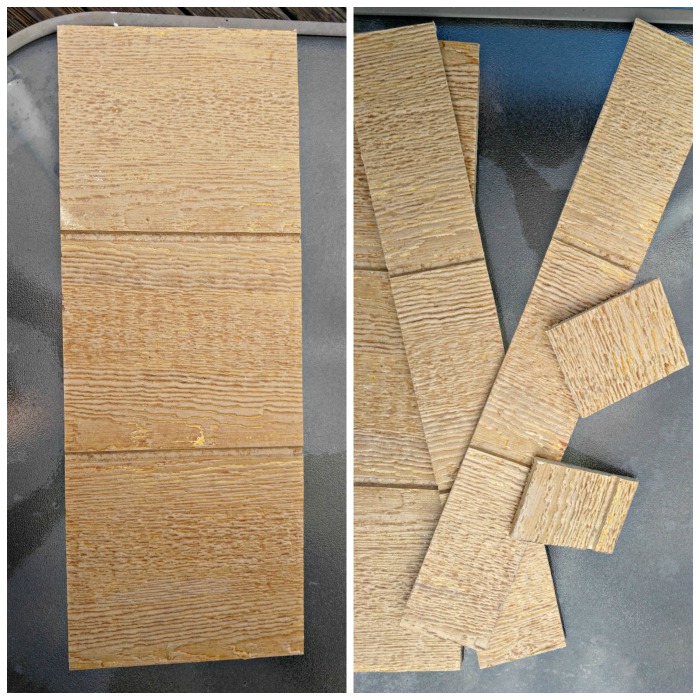
盒子的制作很简单,只需将边缘对齐,然后用小钉子将碎片固定在长方形的盒子里。 
我丈夫给我做了很多不同木色的摄影板。
我所要做的就是选择一种我想要的颜色,这样我就可以用一些胡桃木色的染色剂给盒子内外上色。

See_also: 莱利酒店朗姆鸡尾酒--假期时光! 下一步是把花泡沫装进盒子里。 花泡沫很容易裁剪,我希望整个盒子里面都能铺上花泡沫。
我希望我的装饰品能高高地摆放在盒子里,而且添加泡沫还意味着我不必添加那么多的绿植(使得制作成本更低,但看起来仍然郁郁葱葱)。
泡沫还为我提供了一个放置绿植茎的位置,让它们摆放得更加美观。 
盒子完全干透后,我剪下适合底部的毛毡,用热熔胶粘好。 我还在盒子的每个角落和中间各加了 6 个 1 英寸大小的毛毡垫,以保护家具。 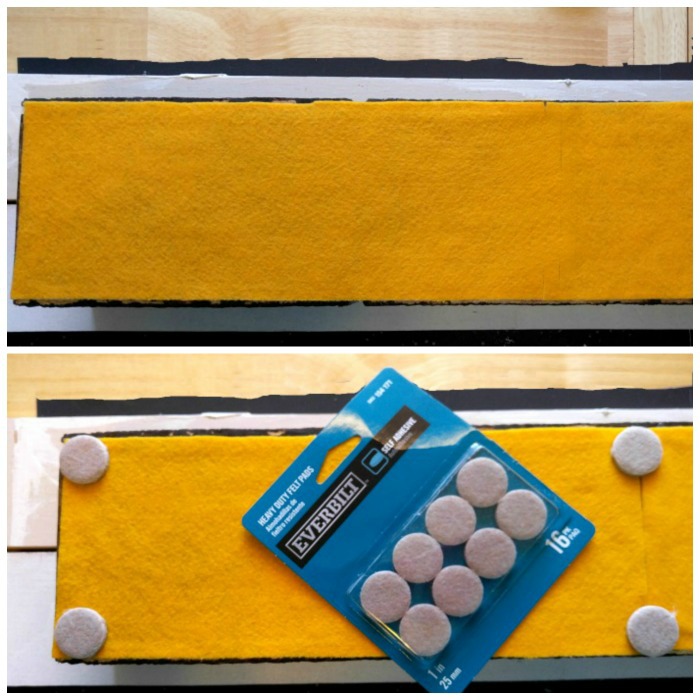
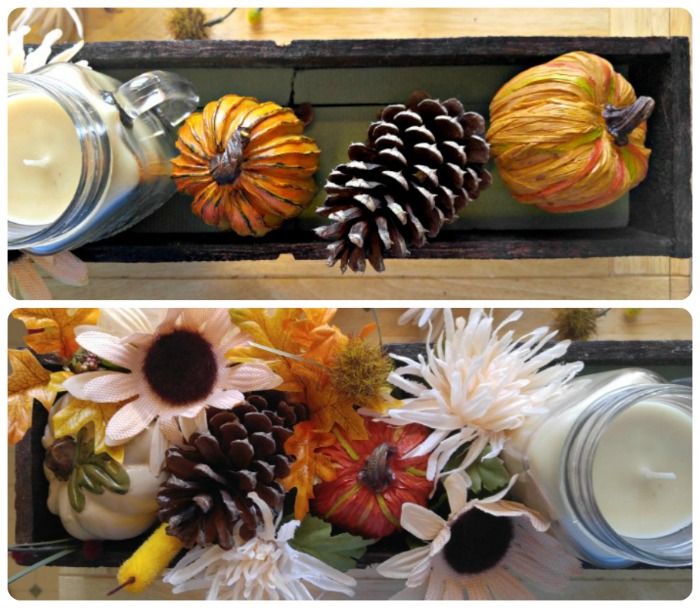
现在是有趣的部分了。 我喜欢摆放任何花卉。 我首先把蜡烛和小南瓜摆放在我想要的位置,并稍微调整了一些角度。
然后,我就从一端开始,将绿色植物摆放出令人愉悦的效果,并填满空位。
我先做完一边,然后尝试在另一边做镜面效果,朝相反的方向,这样桌子的两边都能欣赏到这幅画的外观。 感恩节中心装饰
最后一步是在梅森瓶蜡烛的颈部添加一些秋季丝带,并在上面打一个蝴蝶结。 我用胶水将丝带的两端粘在蜡烛瓶上。 
现在是时候看看它在餐桌上的效果了。 感恩节中心装饰
中间的摆设在桌子上非常平衡,占据了桌子中间的大部分,两边的桌子面积也相等。 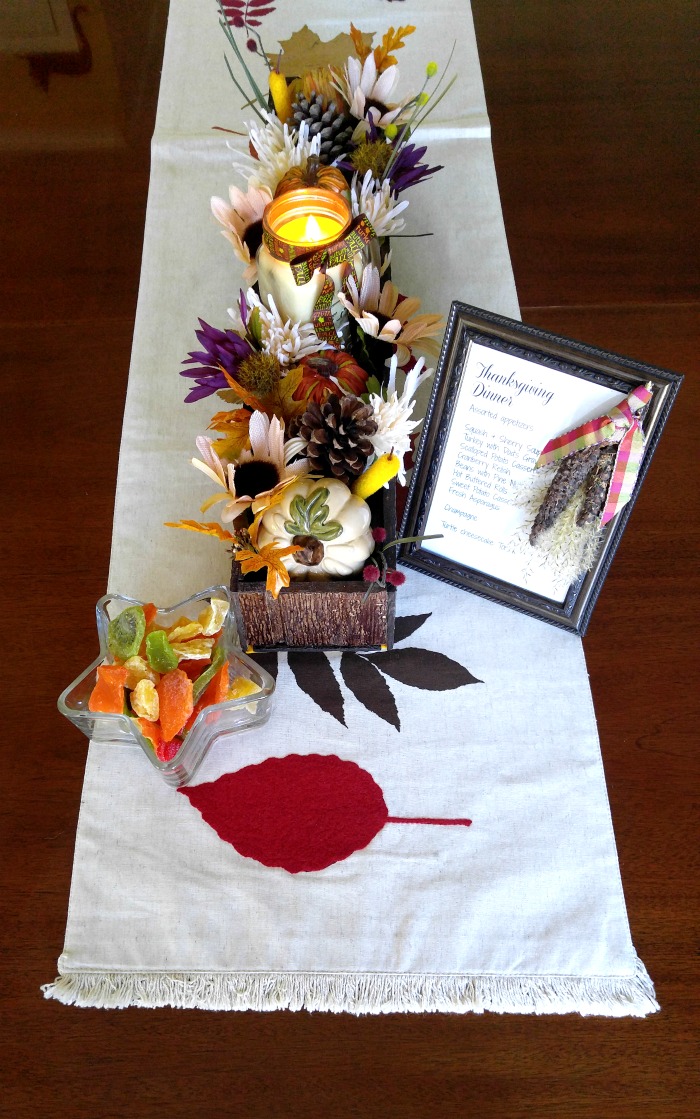
我添加了一碗秋色点心和感恩节框架菜单(点击此处查看此项目)。
桌子已经装饰得很漂亮了,就等着我把感恩节食物摆上去了。 我等不及了! 
我最喜欢的一点是 感恩节中心装饰 因为几周后,我就可以通过更换绿植,轻松地把它换成圣诞装饰。
这是它在圣诞节时的样子。 很难相信它们基本上是同一个项目,不是吗? 在这里查看圣诞中心装饰的教程)。 
这是由牡丹、绣球花和菊花组成的春季中心装饰。
您在节日项目中使用过再生木吗? 您用旧木头制作过什么东西? 请在下面的评论中告诉我们。
如需了解更多假日 DIY 项目,请务必访问我的 Pinterest 节日 DIY 和手工艺品板块。

Bobby King
Jeremy Cruz is an accomplished author, gardener, cooking enthusiast, and DIY expert. With a passion for all things green and a love for creating in the kitchen, Jeremy has dedicated his life to sharing his knowledge and experiences through his popular blog. Having grown up in a small town surrounded by nature, Jeremy developed an early appreciation for gardening. Over the years, he has honed his skills in plant care, landscaping, and sustainable gardening practices. From cultivating a variety of herbs, fruits, and vegetables in his own backyard to offering invaluable tips, advice, and tutorials, Jeremy's expertise has helped numerous gardening enthusiasts create stunning and thriving gardens of their own.Jeremy's love for cooking stems from his belief in the power of fresh, homegrown ingredients. With his extensive knowledge of herbs and vegetables, he seamlessly combines flavors and techniques to create mouthwatering dishes that celebrate nature's bounty. From hearty soups to delectable mains, his recipes inspire both seasoned chefs and kitchen novices to experiment and embrace the joys of homemade meals.Coupled with his passion for gardening and cooking, Jeremy's DIY skills are unparalleled. Whether it's building raised beds, constructing intricate trellises, or repurposing everyday objects into creative garden decor, Jeremy's resourcefulness and knack for problem-solving shine through his DIY projects. He believes that everyone can become a handy craftsman and enjoys helping his readers turn their ideas into reality.With a warm and approachable writing style, Jeremy Cruz's blog is a treasure trove of inspiration and practical advice for gardening enthusiasts, food lovers, and DIY enthusiasts alike. Whether you're a beginner seeking guidance or an experienced individual looking to expand your skills, Jeremy's blog is the ultimate go-to resource for all your gardening, cooking, and DIY needs.
